Getting Started
This guide installs the forgeo CLI, initializes a config, and runs your
first backlog task.
1. Install
Install the forgeo CLI with Homebrew on macOS or Linux
(no Python required):
brew install lucaGazzola/forgeo/forgeo
On newer Homebrew versions (4.6+) a third-party tap is untrusted by default:
if brew refuses to load the formula, run brew trust
lucaGazzola/forgeo first and install again.
Or from the public GitHub remote with the one-liner (no Python required):
curl -fsSL https://forgeo.org/install.sh | bash
Or with Python 3.11+ via pip:
pipx install forgeo-cli
The Homebrew formula and the one-liner both download a prebuilt standalone binary from the matching GitHub Release; the one-liner covers Linux, macOS, and Windows, while Homebrew installs the macOS (arm64/Intel) and Linux (Intel) binaries. All three installers:
- never need root;
- upgrade an existing install by re-running them (
brew upgrade
  lucaGazzola/forgeo/forgeo
, re-running the one-liner, orpipx upgrade forgeo-cli/pip install --user --upgrade forgeo-cli).
The one-liner additionally falls back to pipx and then pip install --user
when no prebuilt binary matches the platform and a Python 3.11+ is available,
and warns you when the install location is not on your PATH.
You do not need to watch for releases: when forgeo start or forgeo once
begins a cycle, Forgeo checks PyPI at most once a day and prints a short
notice (also logged) naming the newer version and the upgrade command when
one is available. The check never auto-updates or modifies the install; set
FORGEO_UPDATE_CHECK=0 to disable it.
2. Initialize
Run the guided wizard from your project root:
forgeo init
The wizard asks for:
- Forgeo folder — where the backlog,
BLOCKER.mdand the log live (default.forgeo). It is gitignored by default. - Backlog provider — where tasks live:
file(local.forgeo/backlog.json),github/gitlab/jira/http. Forgithubit auto-detectsowner/repofromgit remote origin, asks fortoken_env(defaultGITHUB_TOKEN) and can persist a pasted classic PAT (ghp_..., scoperepo) to~/.config/forgeo/github_token_env.sh(600, wired to~/.bashrc). Same forgitlab(GITLAB_TOKEN, base URL) andjira/http. - Coding agent command — the bare command that launches your coding
agent (default
opencode run --auto). Forgeo appends the standard task prompt (which ends in$FORGEO_TASK) automatically, so you never type it. Enter a command that already references$FORGEO_TASKand it is kept verbatim. - Refactor prompt — the instruction used when the backlog is empty; the default is offered, or you can paste a custom one.
forgeo init writes forgeo.yaml, creates Forgeo folder, and appends
<folder>/ to .gitignore (unless you opt out). For github/gitlab/jira
set backlog_provider + backlog URL + provider block is written automatically
and state_dir is set to the Forgeo folder so runtime files stay beside the
config.
forgeo init --force # overwrite an existing forgeo.yaml
3. Create your first backlog
If you chose file in the wizard, the backlog is a plain JSON file (see
Backlog format) — by default .forgeo/backlog.json. Once Forgeo
is running you can also add tasks from the web console — no
file editing needed.
If you chose github/gitlab/jira/http in the wizard, your forgeo.yaml
already points at the provider (backlog: https://api.github.com etc.).
For github create a classic PAT at https://github.com/settings/tokens/new
(scope repo), export GITHUB_TOKEN=ghp_... (or let the wizard persist it),
then forgeo validate before forgeo start. Same for gitlab (GITLAB_TOKEN)
and jira. See Backlog format for provider details.
For jira/github/gitlab, set backlog_provider: to the provider, point backlog: at its base URL
(https://jira.example.com, https://api.github.com / https://github.example.com/api/v3,
https://gitlab.example.com), configure the provider block (jira.jql / github.repo / gitlab.repo and auth),
export the credentials named in *_auth.token_env, and run forgeo validate before starting the daemon.
The dashboard for these providers is a read-mostly mirror: a banner links to the native board, each card links to
the native issue, and Forgeo-specific state (BLOCKED/FAILED reasons, agent_response) is surfaced on the board — triage
stays in Jira/GitHub/GitLab. See Backlog: Jira/GitHub/GitLab for the complete configuration.
{
  "tasks": [
    {
      "id": "TASK-001",
      "title": "Implement fibonacci module",
      "description": "Write a fibonacci module with memoization and tests.",
      "status": "OPEN",
      "created_at": "2026-07-31T10:00:00Z"
    }
  ]
}
Tip
Hand this spec to your favorite LLM to generate the initial backlog for the application you want to build.
4. Start Forgeo
forgeo start
forgeo start launches the daemon detached in the background and exits.
The daemon wakes up every interval_minutes and runs one cycle. Stop it from
anywhere with forgeo stop; forgeo status shows whether it is running. To
run the daemon in the foreground instead (interruptible with Ctrl-C), use
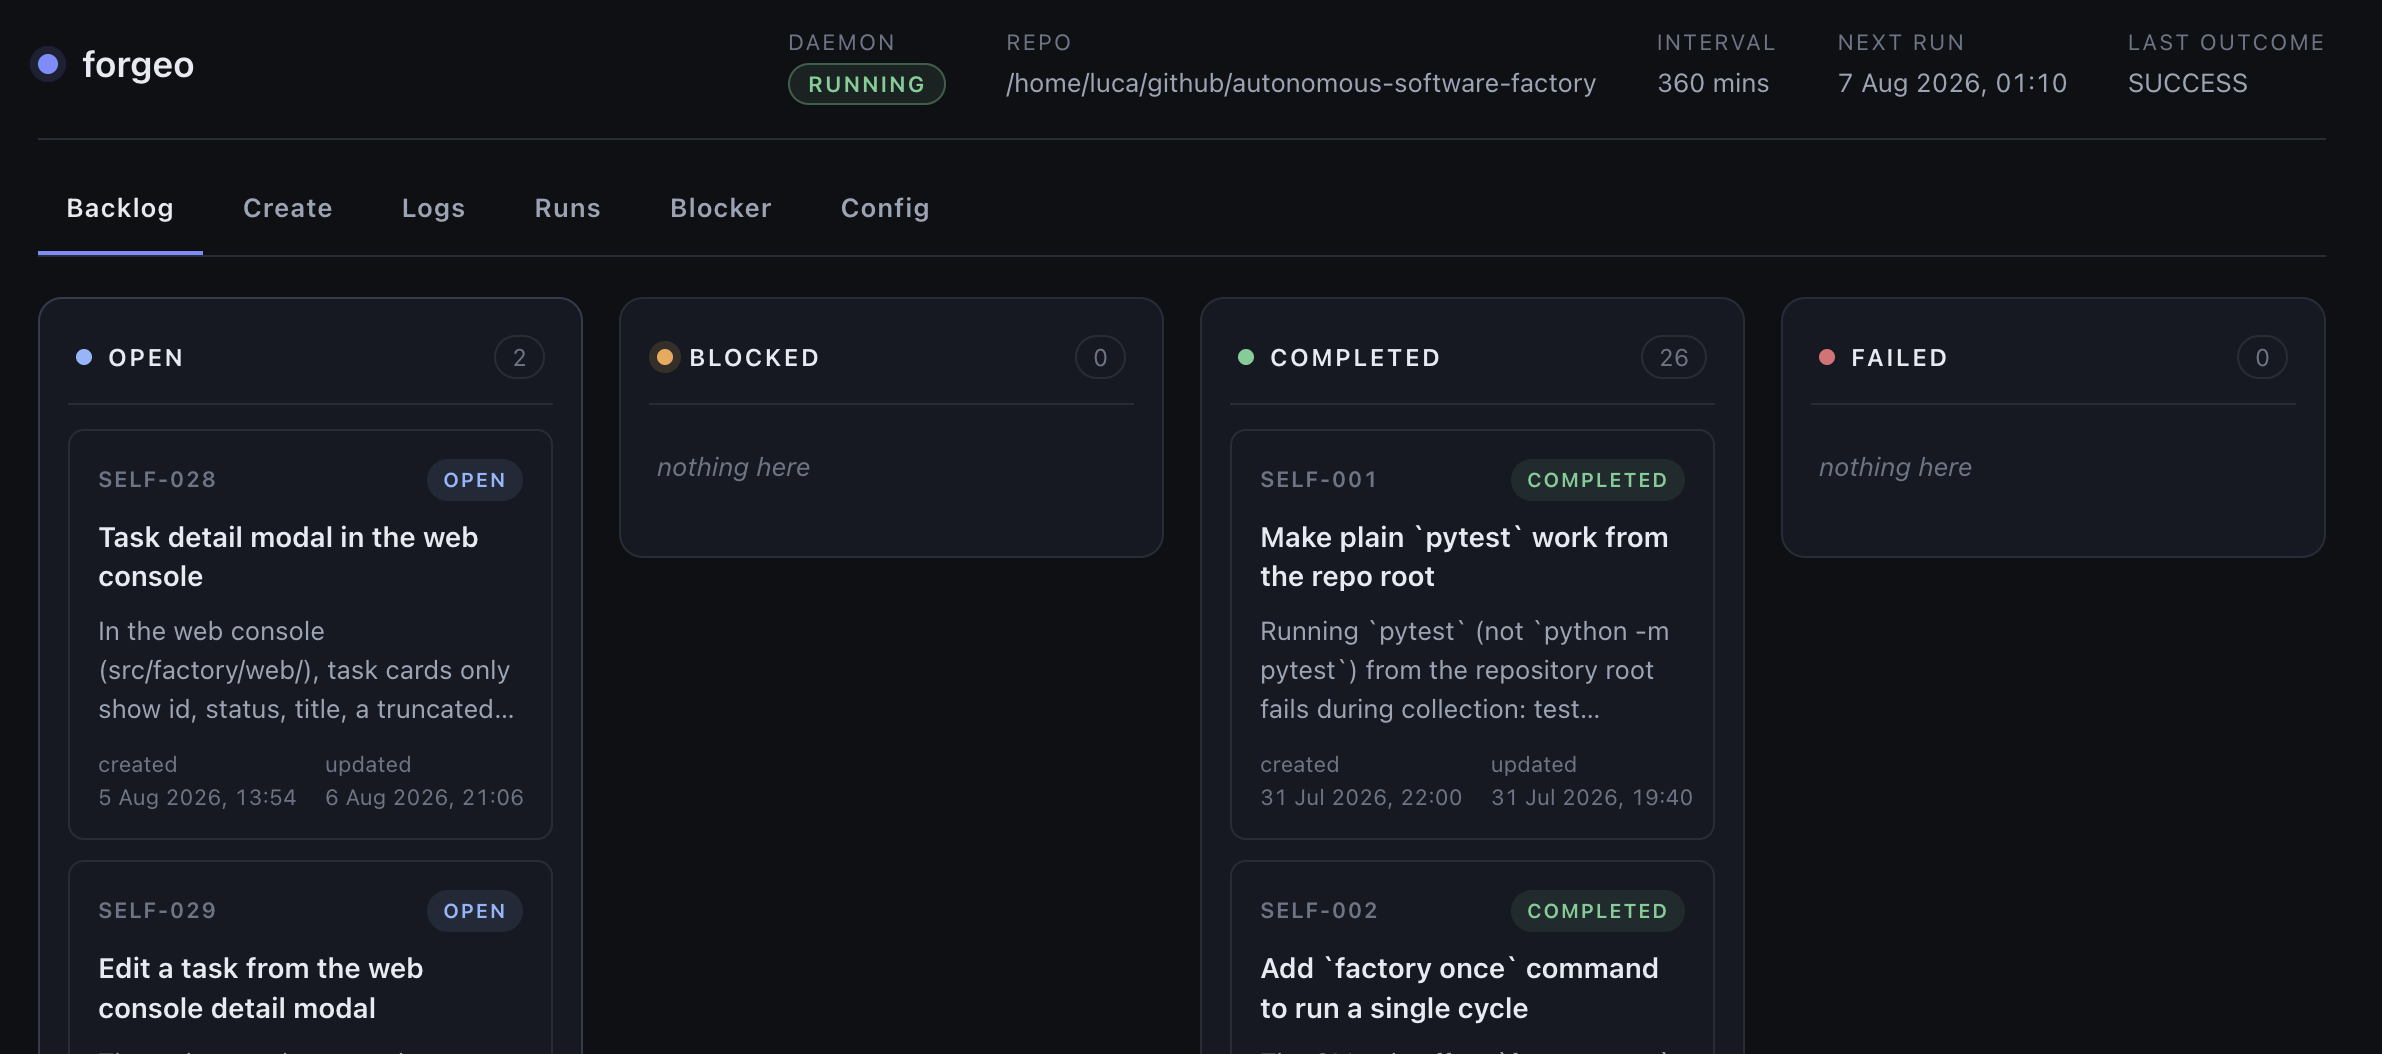
forgeo start -f. It binds no ports itself; open the dashboard (which
shows every registered instance) with forgeo web — see
Web console & HTTP API:
5. Verify
forgeo status
shows the config, backlog counts, the next runnable OPEN task (one whose
dependencies are all COMPLETED), whether the daemon is running, and the last
run outcome. To run exactly one cycle without leaving a daemon up:
forgeo once
To run one specific task immediately instead of the oldest OPEN one — e.g.
to rerun a FAILED task after reopening it, or to try a risky task now:
forgeo run --task SELF-012
forgeo run refuses with a clear error when the task does not exist or is
not OPEN, and when a daemon or another once/run is already running.
Before starting for the first time you can run a read-only dry run that validates the config, repository, branch/remote, backlog, agent command and lock state without invoking the agent or writing anything:
forgeo validate
6. Multiple repositories / instances
Forgeo runs one config per repository — nothing stops you from running
several factories on several repositories at the same time. Each config gets
its own backlog, logs, locks and runs.jsonl, and each daemon is a separate
process, so instances are fully independent. The instance registry gives
every forgeo a stable name so you can enumerate them and manage them from
anywhere.
# 1. Initialize a config per repository (run the wizard in each project root)
forgeo init

# 2. Start a daemon per instance (background; each config is registered
#    automatically under its `name` on first start — or pre-register with
#    `instance add`)
forgeo start --config /path/to/site-a/forgeo.yaml
forgeo start --config /path/to/site-b/forgeo.yaml

# 3. List every registered instance (also: `forgeo list`)
forgeo instance list

# 4. From anywhere, target an instance by name
forgeo start --name site-a
forgeo stop --name site-a

# 5. Open the central dashboard: one page for every registered instance
forgeo web           # default http://0.0.0.0:8790 (foreground)
forgeo web -d        # ...or keep it running in the background
forgeo web stop      # stop the background dashboard
--name works on start, once, status, stop and restart and is
mutually exclusive with --config; an unknown name prints a clear error.
start and stop with --config register Forgeo automatically under
its config's name when it is not in the registry yet, so the registry stays
in sync without manual forgeo instance add steps. See
Configuration for the registry file, and
CLI reference for the commands.
Next steps
- Configuration reference — every
forgeo.yamlkey. - Backlog format — task schema and statuses.
- Agent contract — how the agent is invoked.
- CLI reference — all commands.